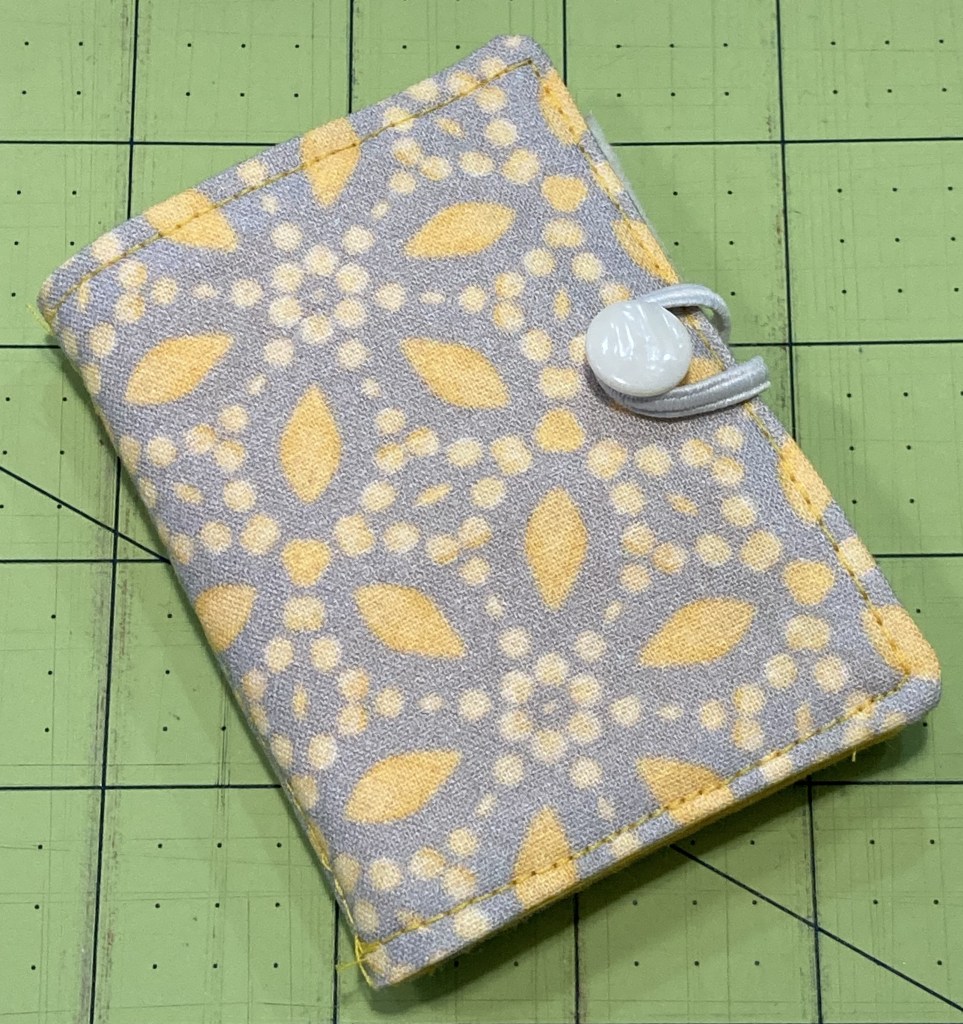
This scrap-buster project will not only help you keep your needles organized, but is also great if you like portable sewing (I like to sit with small projects outside on my patio weather permitting). Costume shop folx: this is a great way to use show scraps to make a small thank-you gift. All straight-stitching with rectangles, it’s also a great project for an introductory sewing class. Alternatively, for a class project: it can be made into a hand stitching sampler book for beginning stitchers (see Part 2 coming soon!).
Materials
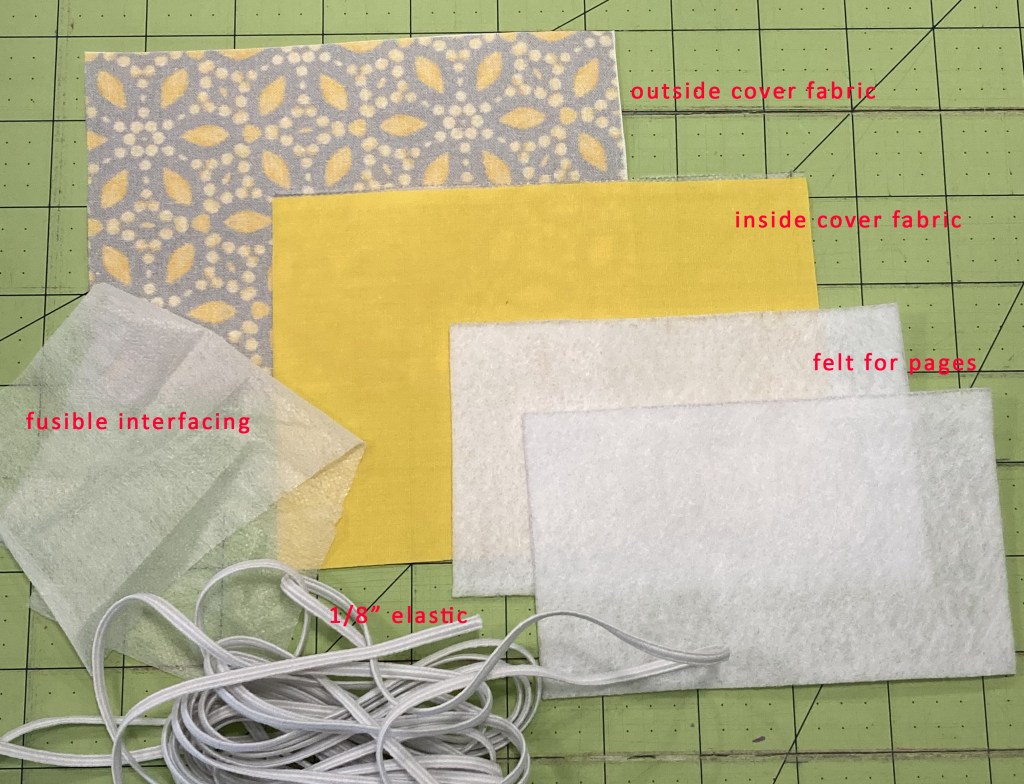
- 1 sheet of craft felt
- 6×4” cut of patterned fabric for the outside cover
- 6×4” cut of plain fabric (or a different pattern) for the inside cover
- Lightweight fusible interfacing
- 3” of elastic (1/8”, round, or you can use a hair tie)
- Button with a shank
- Ruler or template (downloadable below)
- Thread (matching or contrasting to your patterned fabric)
- Iron
- Fabric scissors
- Straight pins or Wonder Clips
- Pencil or disappearing ink marker
- Chopstick (or pencil)
- Hand sewing needle
Step 1
Gather your materials. The patterned fabric I’m using is Marigold Mosaic on Gray from my Gray Illumination collection on Spoonflower. Use the ruler or template (download below) to cut the following:
Cut 1: 6×4” rectangle of patterned fabric
Cut 1: 6×4” rectangle of solid fabric
Cut 2: 5×3” rectangles of felt
Cut 2: 6×4” rectangles of lightweight interfacing
Iron one piece of interfacing to the wrong side of the patterned fabric, and the other to the wrong side of the solid fabric. This will help give the cover a crisper look.
Step 2
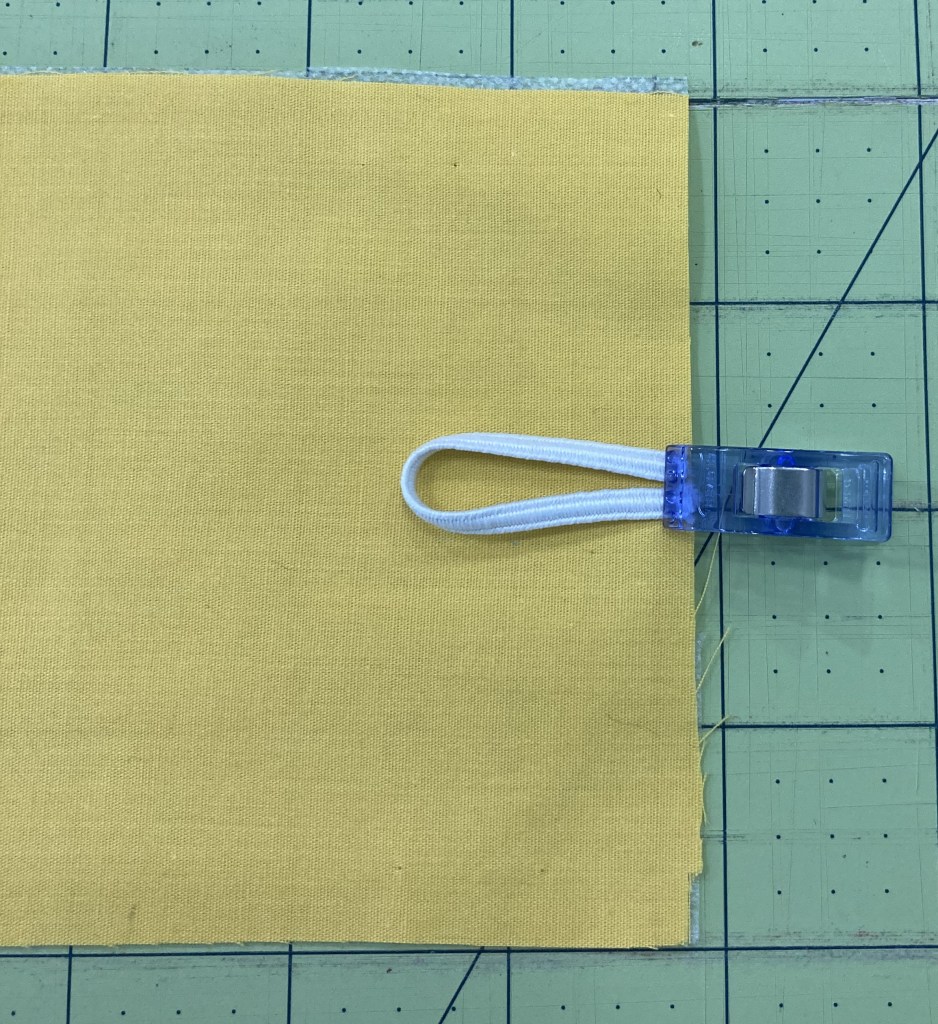

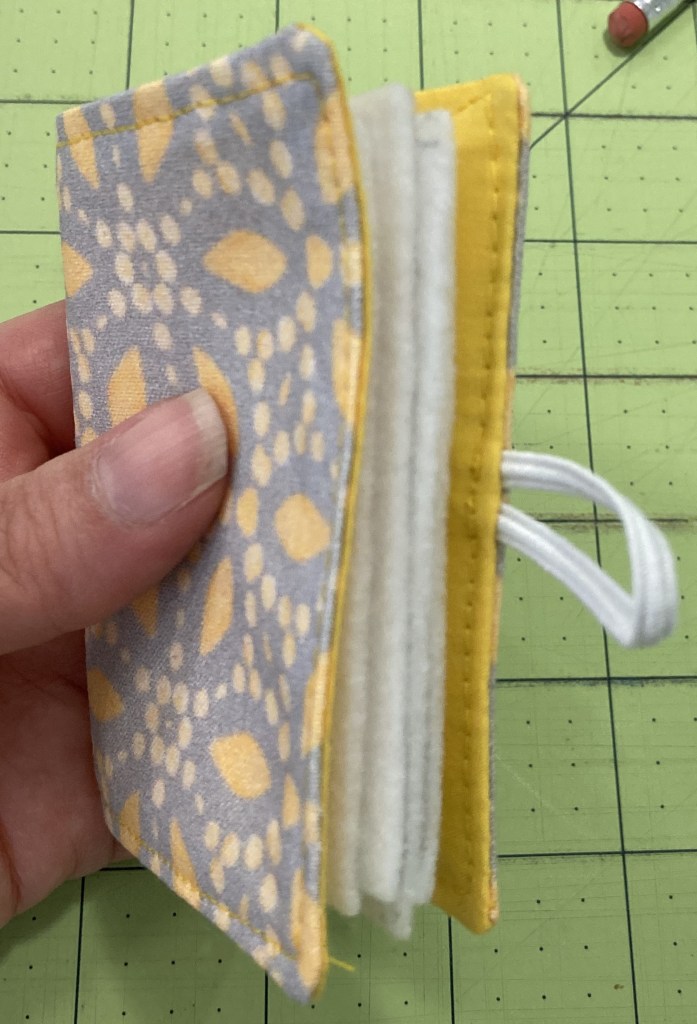
Fold the elastic into a loop. Place it centered on the right (non-interfaced) side of the solid fabric, with the cut ends lined up with the edge, or hanging slightly over. Pin or clip (I find clips easier for this part) in place. Stitch & back stitch over the elastic about 1/8” from the edge of the fabric to tack it in place.
Step 3
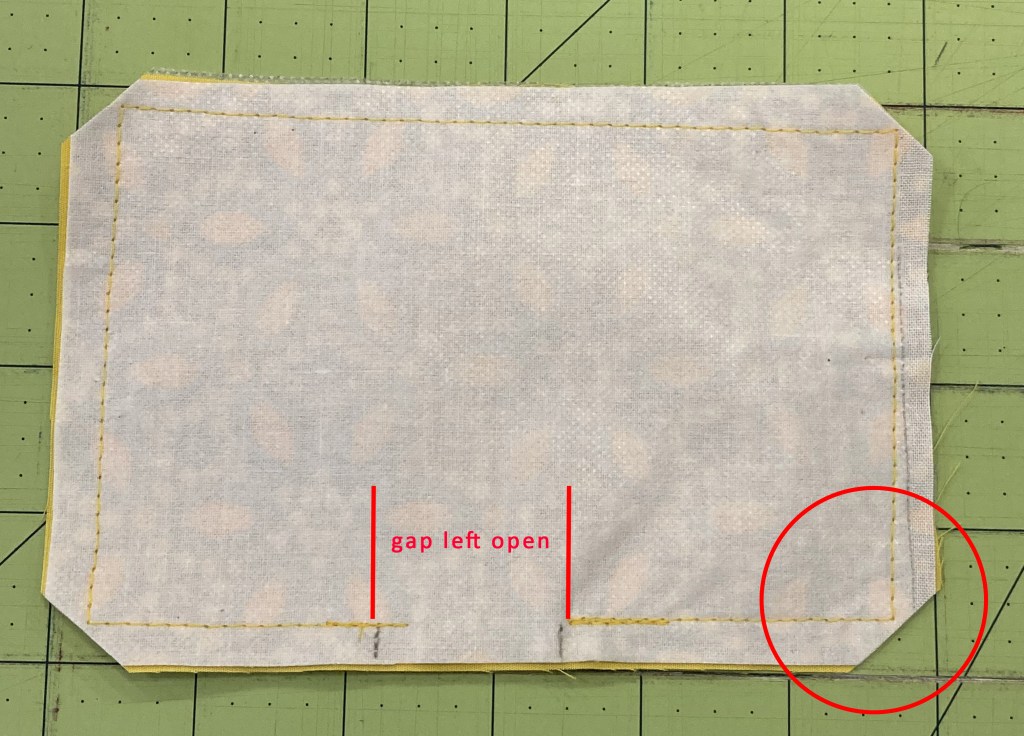
Pin the patterned and solid rectangles right sides together. On one of the long edges, leave a space about 1-1 ¼” wide (big enough to get your thumb through). Starting on one side of the space, stitch around the rectangle with a ¼” seam allowance (on most domestic machines, the width of your presser foot). You will stitch over the elastic again. Don’t forget to backstitch beginning & end! Clip the corners at a 45* angle being careful not to cut through your stitching.
Step 4

Turn the cover right-side-out. The easiest way is to stick your thumb in the opening you left, and work your way to one of the corners on the opposite side. Pinch with your thumb and forefinger, and pull it right-side out. Use the chopstick or a pencil to gently poke the corners out. Your elastic loop should also be on the outside now. Give the cover a good press.
Step 5
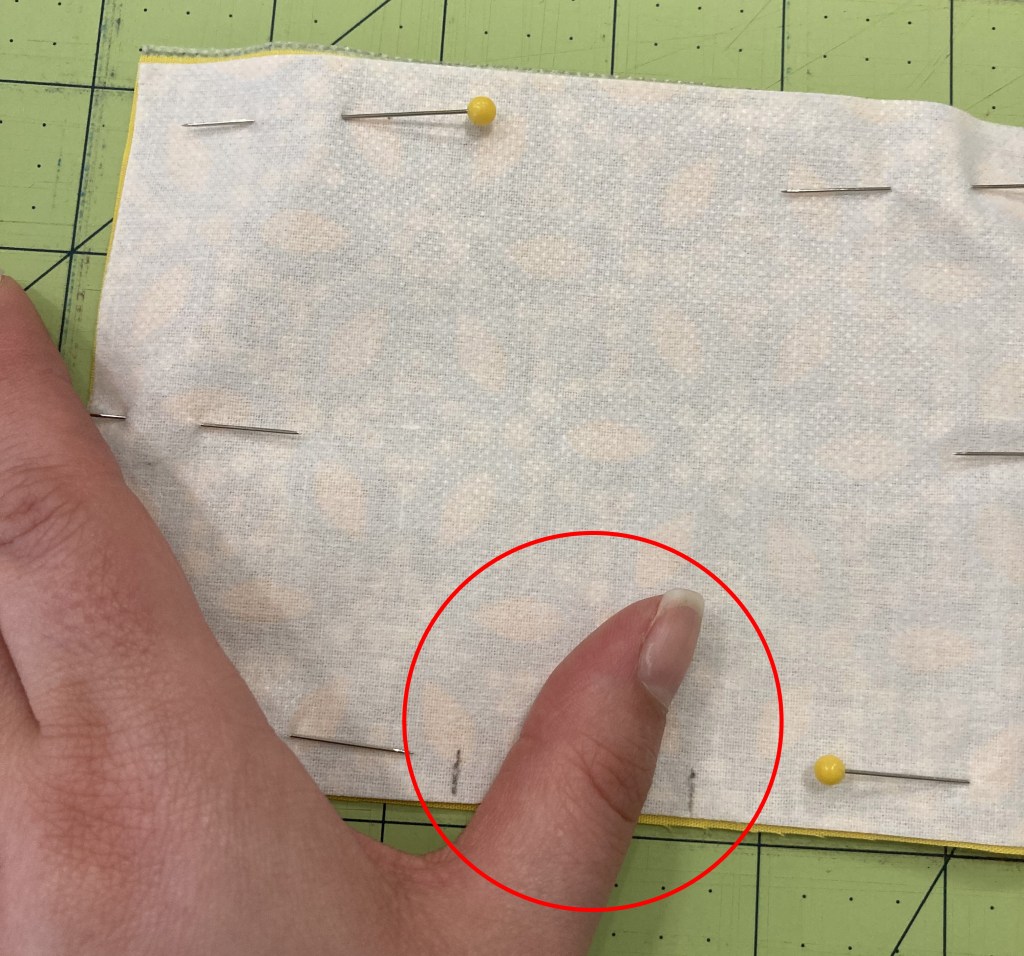
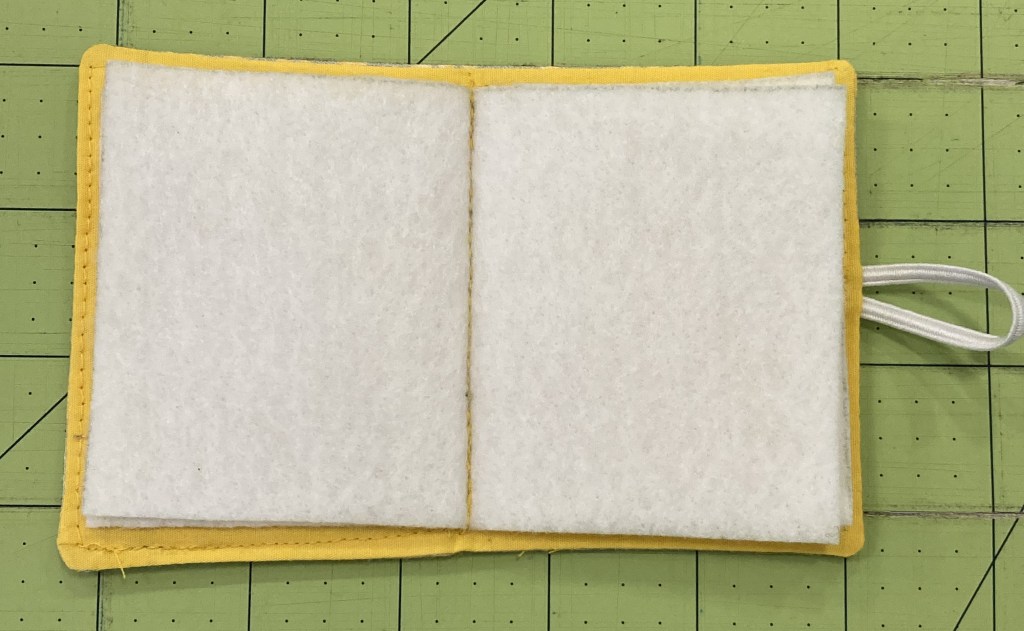
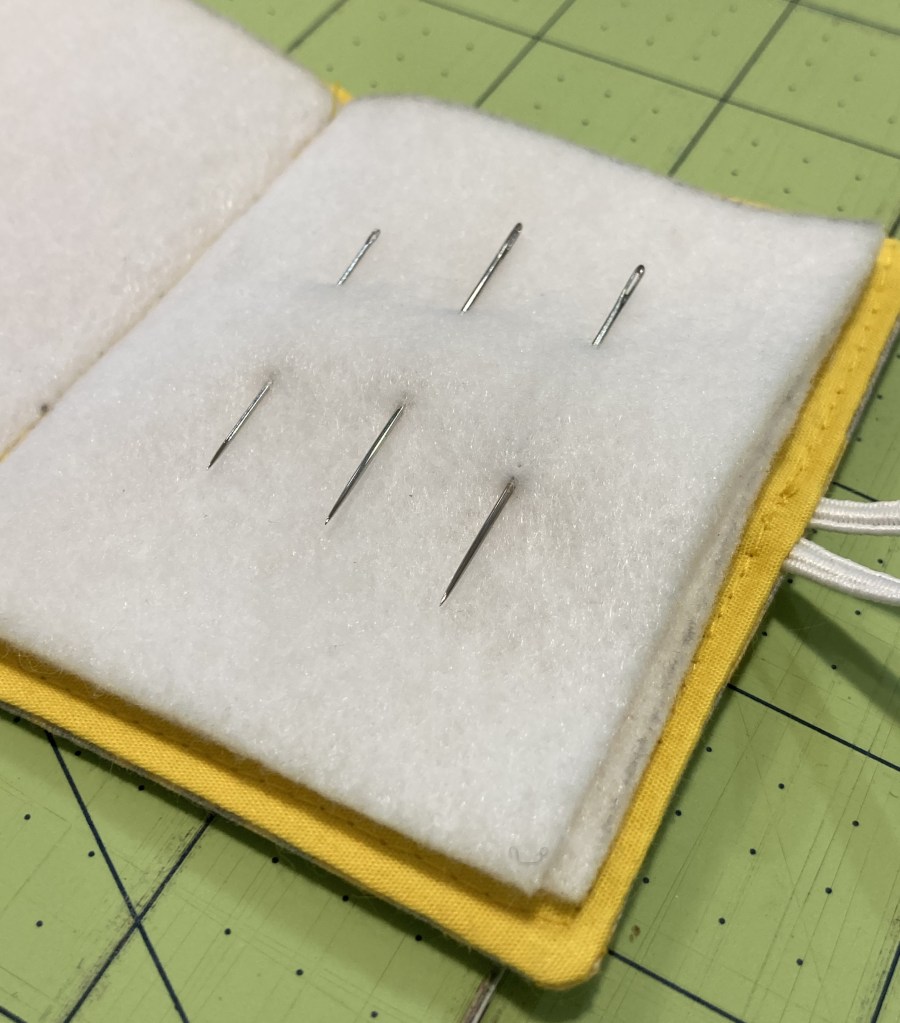
Using a pencil or disappearing ink marker, mark a center line on the solid fabric and both the felt pieces. Stack the felt pieces so that the center lines line up. Stack that stack on top of the cover, again lining up the center lines. Pin in place. Stich along the line from end to end of the cover, backstitching beginning & end.
Step 6
Stitch the button to the top cover of the book about ¼”-1/2” (depending on your button size) from the edge, centered to your elastic loop.

I want to see your fabulous work! Tag a photo of your needle book @mcwolldesigns on social media!
Download written instructions and template below. Written tutorials will always be free to download, but if you’d like to show your support, you can buy me a virtual coffee.
